

Getting Started With Pelican and GitHub Pages
Pelican is an open source static website generator. While Pelican is written in Python, you don't have to know much about that programming language to get started. In this post, I'll walk through the steps to getting your first Pelican website up and running, including a deployment to GitHub Pages for hosting.
A quick note before we dive in. I've been using Pelican for about two and a half years. I currently have three live sites deployed, and the code to each one is on GitHub. Those repositories are this blog, my Coding Across America project, and the Full Stack Python walkthrough. I can't guarantee that each one uses Pelican version 3.3+ best practices, but each one does exactly what I want it to do: get out of my way so I can write and publish.
I'm assuming you're working with Mac OS X or Linux for this tutorial. I used Cygwin on Windows a couple of years ago to get some of this working so that may be an option if you're operating system limited.
Kickstart Example Project
Let's use the Full Stack Python code to get up and running within just a few steps.
First, grab the code and put it in a directory named "fsp":
git clone git@github.com:mattmakai/fullstackpython.com fsp
We can already get the website working since it's already been generated in its current state by Pelican when I checked it in. Go to the "fsp" directory and use the built-in Python HTTP server:
python -m SimpleHTTPServer
Full Stack Python is now running on port 8000. Go to http://localhost:8000/ in your browser and you'll see the same site that's currently on fullstackpython.com. Note if you want to run more than one site at a time you can add a port number after "SimpleHTTPServer" to serve on a different port.
Now we need to install the dependencies to make changes to the site and regenerate the output. This step is the one part that takes a little more Python knowledge. We need to use pip to install Pelican, but first we need to make sure pip is installed. On Mac OS X's console:
sudo easy_install pip
On the Ubuntu command line:
sudo apt-get install python-pip
If you're not familiar with Python, you'll also want to look at virtualenv to isolate Pelican's dependencies. This will be important if you have more than one Pelican-using project and they are on different versions of Pelican. Python developers can just nod and move along here.
Full Stack Python's dependencies are stored in the fsp/source/requirements.txt file. Go to that directory and install Pelican:
pip install -r requirements.txt
That will fail if you're not using a virtualenv because you're trying to install these requirements into your base Python installation. If you don't want to use virtualenv at this point just put a "sudo" in front of the command.
We're ready to make a change now. Go to the fsp/source/content/pages/ directory and modify one of the files. For example, add another entry in change-log.rst then save the file.
Pelican needs to regenerate the website output before you can see the results in your browser. I've wrapped those changes in a Makefile stored in fsp/source/. Rather than explaining make here, let's just execute the commands manually that we need to regenerate the website:
cp -R static-html/* ..
pelican -t theme -s settings.py -o .. content
cp ../pages/* ../
rm -rf ../pages/
What's all that? Basically we're just:
- copying static files that Pelican doesn't touch (like CSS, JavaScript, and images) into our output directory
- regenerating the website HTML output with Pelican
- copying the files Pelican puts in the pages directory into the base directory
- deleting the pages directory
I wrap those commands in a Makefile to automate the execution of those commands. Note that there's a bunch of ways to make this build process more efficient. But once I got everything working I focused on writing and publishing. You should figure out what setup will work best for your goals.
Now the website is regenerated and you should see the changes in your browser when you refresh the page.
GitHub Pages
GitHub Pages is an easy and free way to host static websites. You just need to have a branch called "gh-pages" in your repository, then go into the application's settings through GitHub's user interface and enable GitHub Pages.
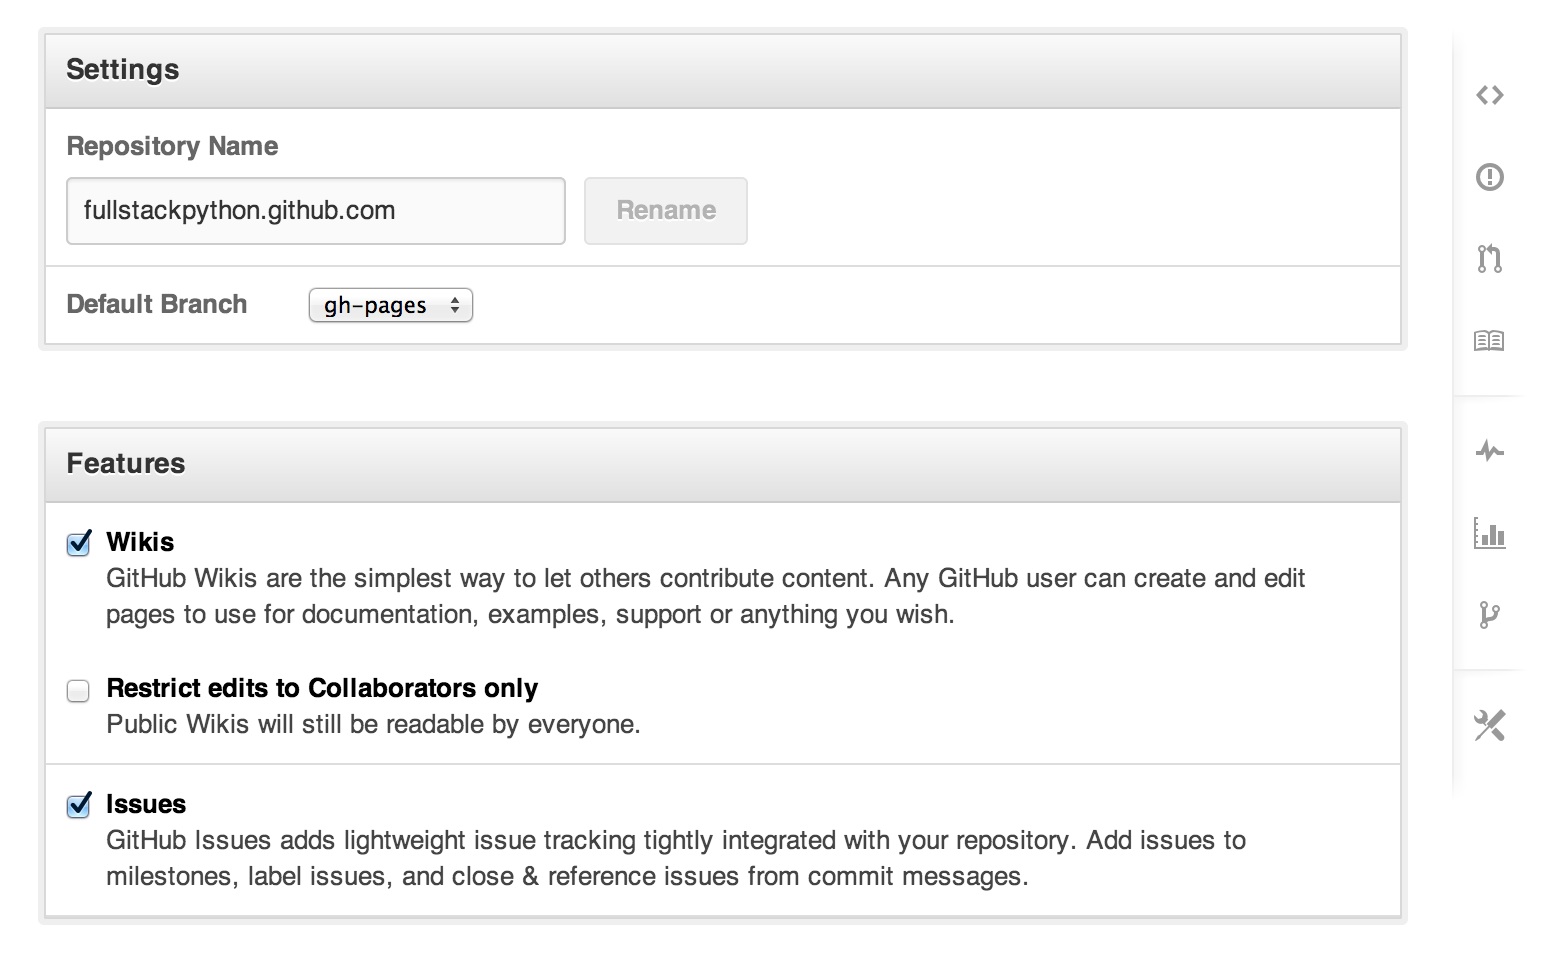
GitHub Pages settings through the user interface on their web application.
Fork the Full Stack Python repository or create a new repository with a gh-pages branch. Enable GitHub Pages under the application settings. Then you should be able to access your static website at [repo name].github.io.
One last note. You can point your host records for your DNS settings of a domain you own to 204.232.175.78 so the site will be accessible through your domain name. I use Namecheap as my domain name registrar so my host records for @ and www look like this:

Namecheap host records pointing to GitHub Pages IP address for fullstackpython.com.
That's all for now! You'll definitely want to check out the Pelican Getting Started Guide next for a thorough walkthrough of setting up your own new project.
If you enjoyed this post you should check out my Coding Across America and Full Stack Python projects, both of which are Pelican-powered websites with all code freely accessible on GitHub.